Providing some tactics to help you get ahead in this mammoth RPG.

Xenoblade Chronicles 2 is a massive RPG. In fact, it will probably take you hundreds of hours to see all of the content within the game. After spending a lot of time playing myself, I have some tips and tricks to share with the readers here at NWR. There will only be light spoilers here, so don’t worry if you’re not that far into the story.
General Tips:
Have fun! If you aren’t enjoying a particular aspect of the game see if you can avoid it. Though you should read through the rest of these tips to see if it may be more rewarding than you know.
Save often. Crashes that require a restart are rare but have been known to happen. Without auto save functionality you don’t want to lose hours of progression. Be smart and don’t risk losing a day’s worth of play.
Learn the combat system. I’m not going to go into it here as this could be its own article, but learn how combat works and then use that knowledge to your advantage. There’s a recent podcast that just so happens to discuss the combat system.
Learn the menus. Yeah, they are a bit clumsy, but really take some time to familiarize yourself with the layout as there are probably things you are missing which can really help you out.

There is paid DLC for the game. Some of the rewards are available now and more will be coming throughout 2018. You can only get this DLC by going into the Nintendo eShop yourself. For a list of what’s being offered now check here.
I’ve heard the Luck stat factors into bonding Blades, so you may want to put some Luck accessories on whatever character you’re going to bond to.
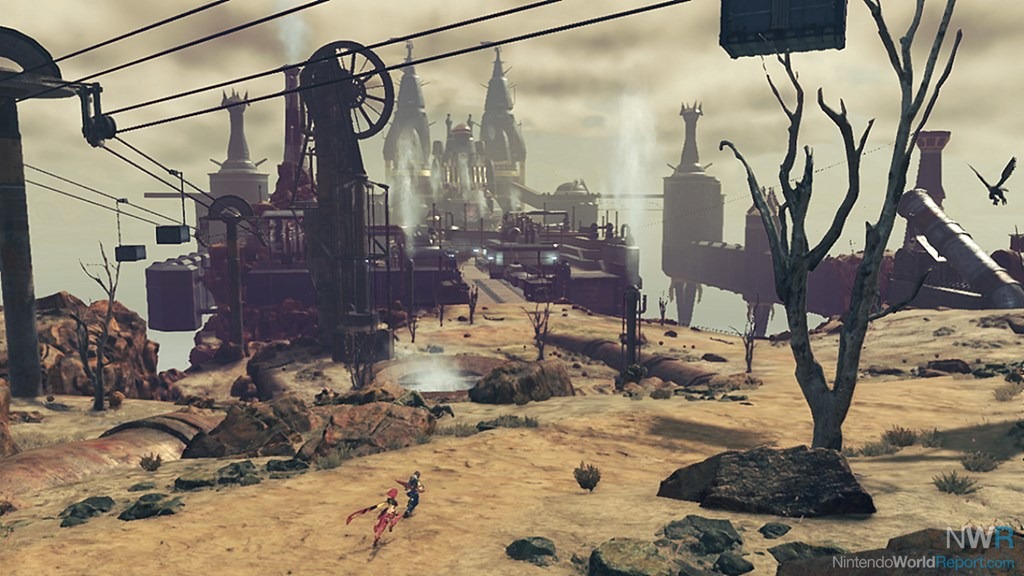
Explore. There are a lot of benefits to taking time out of your current quest to explore your surroundings. Sleeping at Inns converts your experience into level progression, chests with valuable items are scattered throughout the countryside, and more. Exploration is a big part of Xenoblade Chronices 2.
Don’t ignore Collection Points. When you see that glowing orb on the ground take the time to pick the items out of it. These can come in handy.
Power Up Characters
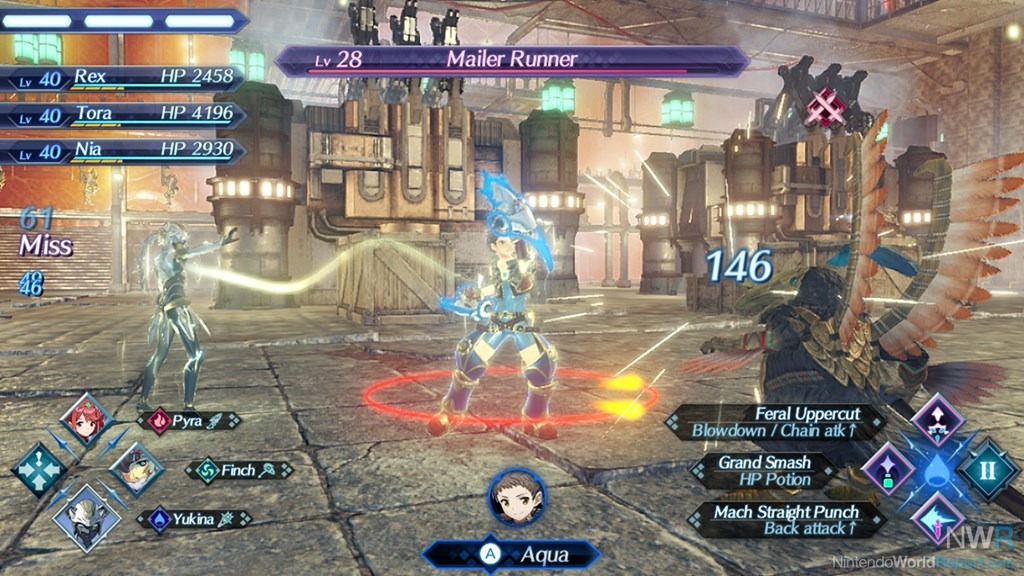
At first, combat can seem really slow. The key to speeding it up is to understand how to make your team more powerful (and maybe check out the Combat Exploit section below). There are a number of ways to power up your characters. The first is to level up, which is simple enough for anyone that’s played an RPG before. However, there are a bunch of other ways to do this that can easily be overlooked in the confusing menu system.
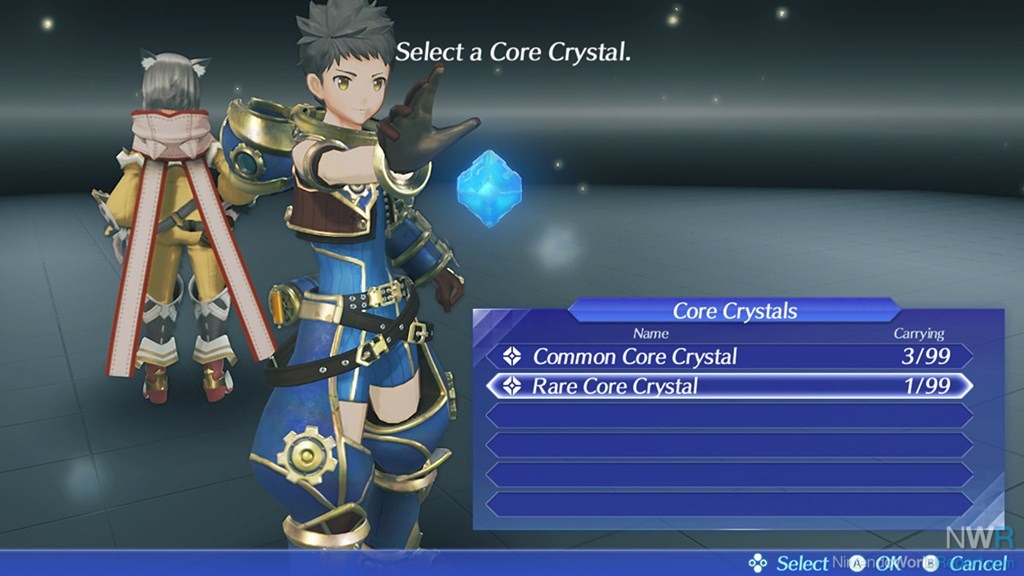
Blades matter. Rare Blades provide some great power boosts so try to open as many core crystals as you can early. Personally, I like to keep each character in their specific role, but you may choose to take another approach. If the type of Blade doesn’t match the role you’ve assign to the Driver you can use an item called an Overdrive Protocol to move it to a different Driver. However, there are only a limited number of these in the game and farming more is very annoying and time consuming. Some Overdrive Protocols are also offered in the paid DLC. Use them wisely.
Drivers
Power up Arts with WP: You will get WP from defeating enemies. This WP can then be used to power up different Driver Arts that corresponds to a Blade’s weapon type. (You can also get items to add WP to a specific weapon type called Weaponry by completing a Blade affinity chart.)

Driver Affinity Chart: Completing quests will award Skill Points which can be used to power up a Driver in various ways. Check out their chart and pick abilities that you see fit. (I recommend getting the Art that lets you cancel Driver Arts into other Driver Arts.)
Accessories: Apply accessories to each Driver that complements their play style.
Pouch Items: These items will wear out over time but can provide different types of boosts. Eventually it’s possible to find extra pouches in the world so it’s possible for each Driver to wield two pouches for extra power.
Blades
Core Chips: These are, basically, the weapon your Driver will be using. They can influence a variety of stats so pick one that compliments the role. Just keep in mind these do get used up if applied to a Blade and can’t be transferred.
Affinity Chart: A Blade’s Affinity Chart is something everyone should be mindful of and if worked on can provide some powerful boosts. If you unlock a new skill in this chart be sure to check it immediately within the menu, as it only truly becomes available if you look at it. The game telling you it’s unlocked while wandering the world doesn’t mean it’s applied yet. Work on these frequently, especially for Rare Blades.
Aux Cores: These are further bonuses that can be applied to each Blade. You may have to refine them in a town before using, but they are worth it.
Merc Missions
During Chapter 4, you will unlock a feature of the game known as Merc Missions. These missions allow you to send extra Blades on quests they complete on their own. Each one takes a specific amount of time, and that time can be reduced by sending Blades with the desired Field Skills (a great use for those common Blades).
Merc Missions provide a number of benefits. Once completed they will help fill in a Blade’s Affinity Chart, raise the Development Level within the continent they were completed in, and help raise your Merc Level. Additionally, Blades can come back with rewards based on the mission such as gold, experience (redeemable at inns), new items for shops, and various other useful items.
If you don’t care about the in-game timer, I also recommend running Merc Missions when you aren’t readily playing the game. To do so effectively, first go into the Nintendo Switch settings and turn off the Auto-Sleep mode. Then set up some Merc Missions, leave the game running, and watch their timers count down while you do your chores, homework, TV watching, etc. Let the game work for you.
Power Up Poppi
This is somewhat optional but I still highly recommend it. Tora’s Blade Poppi can be one hell of a Tank if the player puts the time into powering her up. In order to do so you will need to play the arcade minigame Tiger! Tiger! many times. Successfully completing the minigame will award you with Ether Crystals which can be used to give Poppi upgrades, new equipment, and more. Players can also be rewarded with different Chips to help customize the Blade, some of which are very good.

My tips for playing Tiger! Tiger! are to really familiarize yourself with each stage and its hazards, but be aware that there are a few random elements. Let the screen scrolling take you into the chests and the wrench (which lets you attack in diagonal directions but will be lost if you take damage). I also have better results playing this game with the control stick as opposed to the D-Pad.
The first level is easiest and great for farming Ether Crystals, but I assume the later levels give better items. Focus on getting the chests in order to get more items for Poppi once you have enough Ether Crystals, but it never hurts to get more of those either.
There is an Easy Mode to Tiger! Tiger! that has been added, but I heard it will put an asterisk next to your score to shame you. But if you don’t like the minigame, who cares? Just do what’s best for you. And if you REALLY hate Tiger! Tiger!, there is another tank that joins the party later on who is perfectly suitable as a replacement for Tora, but I doubt they will be better at the end of the game if a player really grinds out good stuff in the Tiger! Tiger! minigame.
Earn Cash Fast
One of the best ways to make some easy cash is to salvage for it. I think the best spot to do so is in Mor Ardain’s lower level just southwest of the Cargo Transportation Zone. This is an easy triple A salvage spot.
I recommend buying the most expensive Cylinders you can from the continent with the highest Development star ranking as they will have the lowest price there. Prior to salvaging, attach Blades to each member in your party, both active and inactive, that have the highest Salvaging Field Skill. Then salvage like crazy in the previously mentioned spot.
Once you’ve run out of Cylinders, go to Alba Cavanich in Mor Ardain to sell off a ton of what you picked up at the Martietta Trading shop. Do note that you won’t be able to turn all of your findings if your Boosters are full, so feel free to sell some off in order to free up space so you can earn some real bucks.
Raise Development Level Quickly
Once you have earned a ton of money you may want to use it to raise the Development Level of an area quickly. You’ll use a lot of money doing this, but it will make more Merc Missions and Quests available, not to mention lower the price in shops.
The trick is simple. Buy blocks of the most expensive Cylinders from someone selling them and then sell the same amount back. I tend to do this in blocks of 20. After a short amount of time you should max out the Development of a continent to five stars.
Combat Exploit
There is an exploit that can really help out with certain weapons in combat. It’s usually wise to sit still and let the three hit combo for weapons play out in order to power up Arts. However, for many weapons including Rex + Pyra’s Sword, there is a better way.
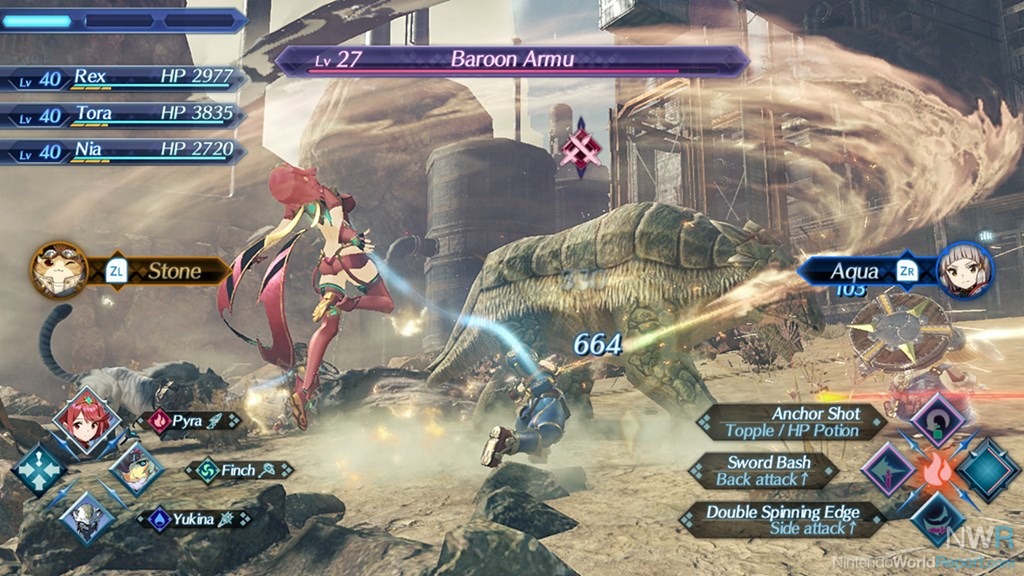
When using Rex and Pyra, wait until the second you see the damage number pop out of an enemy from the first auto attack. Immediately after you see this score tap the control stick briefly in order to have Rex move, then quickly release the stick to the neutral position. Doing so will reset Rex’s auto attack and he will start a second swing almost immediately. As soon as the next swing of the auto attack hits, repeat the trick. You’ll be powering up Arts, and thus Specials, in no time at all.
Once you get this trick down you may even find it possible for one character to do all three attacks in a Blade Combo. To do so, make sure you switch Blades to spam their specials before cycling back around to the first. This will quickly build up your special meter. It can work.
Just note that this trick doesn’t work well with all the weapons in the game. So test out different combinations to see what’s best.
Obtaining Deeds
Xenoblade 2 clumsily tries to explain obtaining deeds early on. Basically, if you buy all of the items available from a shop you can then go back and buy the deed for it. Owning these deeds can give you amazing bonuses such as faster walking speeds, more gold from battles, more experience from battles, and more.
Early on you won’t be able to buy many shops outright. However, progressing the story and completing special Merc Missions can help make more items available within them. Check back from time to time since these bonuses can really help out.
Grinding
While probably not necessary I found that there are some great spots to grind out some levels in the game. Please note that taking real advantage of these spots will probably require you to have a balanced team that is powered up to a degree (including Poppi), and to potentially use the Combat Exploit mentioned earlier. All of these things together will allow you to kill enemies several levels higher than you and gain you some great experience if successful. It sure beats getting into a ton of smaller pointless fights in my opinion.
Note: While grinding anywhere it’s a good idea to try and get the multiple deeds that increase experience gain, but you may not be far enough along in the story or Merc Missions to accomplish this. Just a tip.
The first place I’d recommend is the Old Quary located northwest of Loska’s Gap in the Stomach area of Uraya. The level 47-49 Storm Gyanna monsters here are what I was grinding at approximately 12 levels lower than they are. At first I was gaining over half a level per kill, though this does die down as you progress.
The second area is Mine No. 2 located in the northeast area of Mor Ardain’s Upper Level. The enemies here are in the high 50s to low 60s. Again, I was taking these guys out many levels lower by having a good team and earning crazy experience doing so.
In both cases trying to take down these higher level enemies will be difficult so it’s recommended to try and pull only one enemy at a time. This tip isn’t for everyone, but if you can pull it off you could be crazy overpowered in no time.
New Grinding Trick (Slight Spoilers)
This trick will henceforth be known as the Berube Method.
The location is the Old Gelgemos Gate in the northeast portion of Tantal’s Lower Level. The target is the Tirkin that are in the mid 80s range here. I started farming them traditionally around level 67 with a team consisting of Rex, Nia, and Tora. However, to take full advantage of this spot, there is a trick that requires the rare Blade Perceval. If you get him early be sure to fill out his Affinity Chart and to increase his trust. Why? He has an ability called Brandish which gives him up to a 5% chance of felling humanoid creatures on attack (fails on bosses/uniques). Tirkin count as humanoid, but there is still more to this trick.
I recommend putting Perceval on the second tank party member as this character is an evasion tank. You will be playing as this character for the exploit. The goal here is to use the second tank’s evasion attack to help stay alive (an extra agility added in one of the bonus accessory slots will help) while trying to trigger Perceval’s Brandish while attacking the Tirkin. Tora will function as the real tank, and Nia as a healer.
In one of your accessory slots for the second tank, you will want to equip a Galaxy Cube. I’m not sure where I picked this item up, but it adds a 60% chance of attacking again after a successful auto-attack. Additionally you will want to equip Perceval with a Mirror Matter Core Chip. Again, I don’t know where I picked this thing up either as it was in my inventory, but the Mirror Matter Chip will give Perceval a 25% chance of attacking again after a successful auto-attack.
By now you probably see where this is going. But you will go in, do your Evasion Art when you can (to avoid damage) and then just sit and wait for the auto attacks to hit the Tirkin. You will be earning so many bonus auto-attacks that it’s usually only a matter of time before Brandish hits and instantly kills the foe for some truly massive experience at lower levels. (Note: It’s best to stand still and let the auto-attacks roll naturally since the Combat Exploit mentioned earlier doesn’t seem to help Perceval’s weapon.)
Good luck and happy grinding!
These tips and tricks are only some of what I found in Xenoblade Chronicles 2 and I’m sure there are some I’m forgetting. So please, if you have some of your own spoiler free pieces of advice add them to the Talkback thread below.